03/6/17

Stihl 066 Clone/Frankensaw Experiment

no images were found

I’ve been a bit lazy over the past year and haven’t put anything new up in quite a while. So what better way to kick things off again than with a a chain saw project started back in November of 2015.


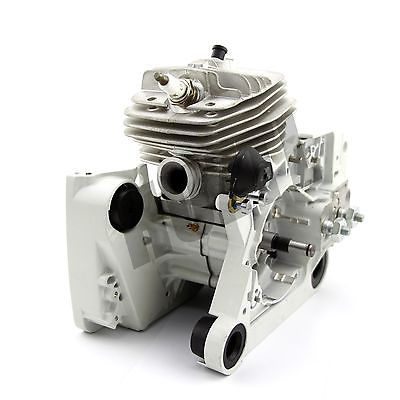
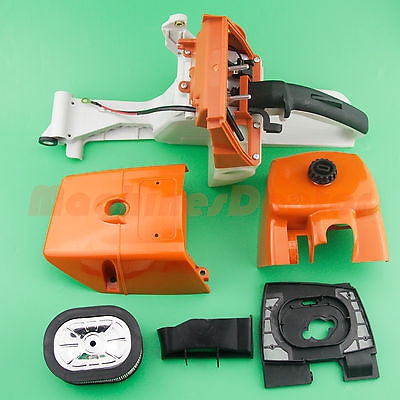
So back in November of 2015 I was wasting time on Ebay like I normally do, and was half looking at random Stihl saws for something to play with. And mixed into the Stihl listings were all these dirt cheap china parts. $12.00 for a recoil, $75.00 for a full crankcase/lowerend, handle sets for $29.00, etc. “Ha, that stuff can’t possibly be worth wasting time with” I thought to myself. But the more I started seeing how expensive beat to death 066’s were, the more the cheap knock off parts started to kind of interesting. Most of these listings seemed to all used the same product pictures, but from different sellers with their own water marks (actually all parts were from “FarmerTec”, more below). Such as:

Machine Doctor-

Hutzl-

So some more digging and I found that while these knockoff’s can’t import an entire saw, they seem to be able to skirt around some rules by offering just parts. For example here’s Hutzl’s store for their Stihl 066 stuff- http://stores.ebay.com/HUZTL-chainsaw-parts

The gears in my head started turning, and for roughly $250-ish it looked like I could build a bastardized Stihl 066 frankensaw brand new! I was very curious how chinese clone parts would hold up over time, in the past with Harbor Freight motors and Lifans I’ve never had any problems, would the 066 parts be the same? Only one way to find out!


Ordering stuff-

While I trust most of the clone stuff, for this project I decided to kind of cheat a bit. I ended for about 25 bucks ordering a real Stihl 066 lowerend. This gave me a valid serial number which made me feel somewhat warm and fuzzy inside and also a real Stihl crank and rod. As a side note, the Stihl 066/660 was built forever. There are several variations in the entire model run, so if you use a Stihl crankcase as a base make sure you know what your doing. If you go the full china clone route there should not be any issues. With the real 066’s/660’s the earlier models have a shorter length crank shaft, narrower crankcase. Also between all these there are about 7 or 9 ignitions with various coil/flywheel combinations (not mentioning the Arctic models), so just be aware.

So on my build I ended up using the following real Stihl bits-

Crankcase/crank, crank shaft seals/gasket, bar/chain, chain sprocket cover, flywheel, and an NGK plug since the china one looked like it was made out of playdoh. Also the rings in the 56mm big bore kit looked not well, so I did fork over 13 bucks for a set of Caber’s.

The rest of the bits were all ordered via slowboat from, well… Which, I must say, arrived much quicker thank I would have thought, roughly a week and a half or quicker. One thing that did become clear though, all these knock off parts are made by a company called FarmerTec.

Parts-

no images were found

Parts showed up safe and sound, no issues at all. Quality on them was pretty solid. Although the rubber was a little questionable.

Cleaning up the crank-

Crank split, new bearings and seals-

All back together-

After a year of use-

The saw runs great and cuts like a rabid beaver, does have a few little kinks but over all I’m pretty dang happy with it.

Thoughts on the clone parts-

All included rubber is garbage. Bar and motor mounts seem to be holding up but may give out and tear. I’m scared of the gas lines cracking eventually and it leaning out, but may replace them before that becomes an issue. But seriously don’t use the included crank seals. After seeing how the other rubber stuff is weathering I’m glad I didn’t. Also the oil cap rubber seal seems to leak like crazy. For example, here is the air dam/plug cover chewed up just from vibrations:

Bolts! They rattle out, but like any big two stroke single I guess this is to be expected. Part of this is from using an older crankcase that had some bolt holes stripped out already. Can’t really fault this on the clone parts. Although the muffler cracked after the bottom came loose, kind of cheap:

Also on the crap list of things not to buy or use beyond the rubber bits, the recoil. Get a real Stihl recoil or you will hate using the saw. The $12 ones on Ebay are $12 for a reason, and with a saw this big back fires or just compression will destroy the recoils little dawgs in no time. The 56mm big bore kit. If you watch the intake and exhaust ports while assembling, you will notice that at TDC it does go full open port, leaving a gap of about 2-3mm. Doesn’t seem to effect how the saw runs but maybe a 54mm kit would be safer if your concerned about it. Orange in the plastic is also a little duller and darker, doesn’t have the sheen or vibrancy of real Stihl orange.

To sum it all up, very happy with the franken 066. It’s deafening loud, torquey, and somewhat scary. If you build one, use real Stihl rubber bits, real recoil, decent rings, and it should hold up just fine. If your an actual logger or can afford it just go buy an 066, but for bigger firewood duty and around the farm its a good saw.

03/21/16

Rusty AllState

00404_6KNQFItFova_600x450

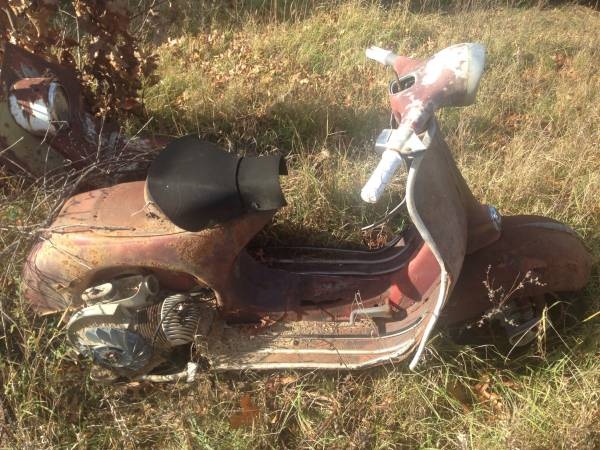
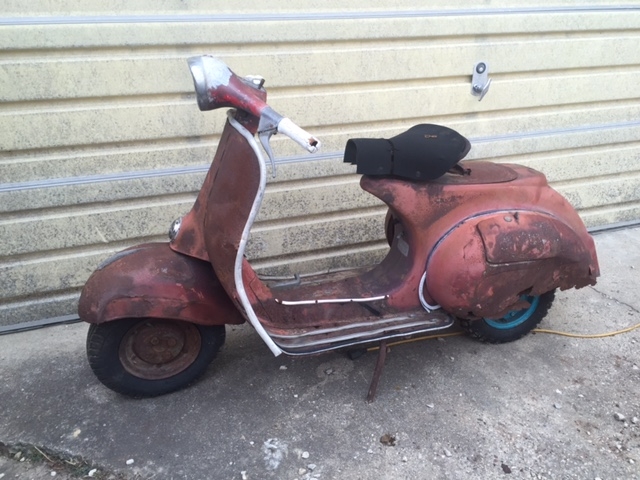
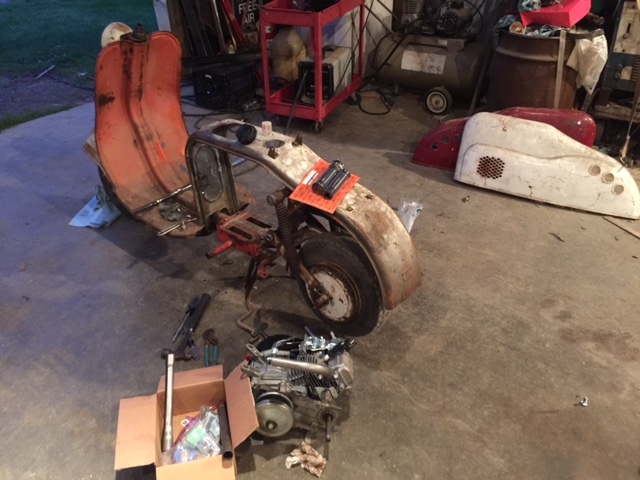
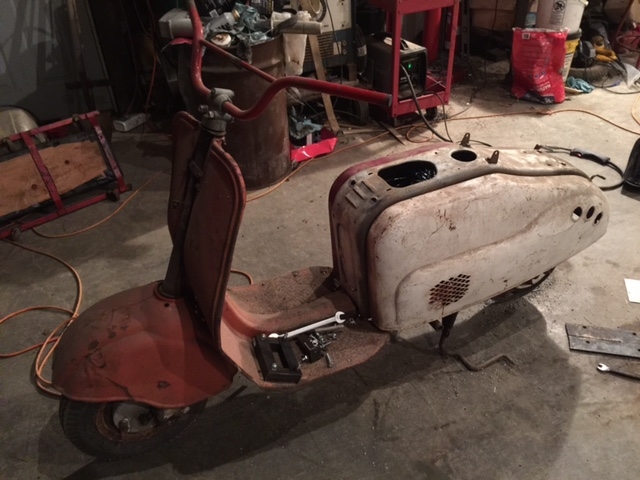
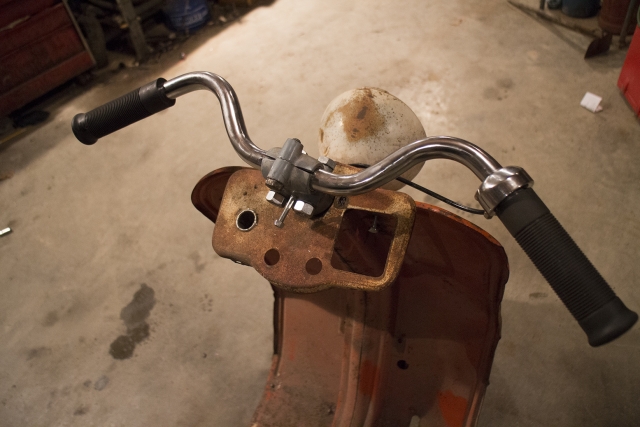
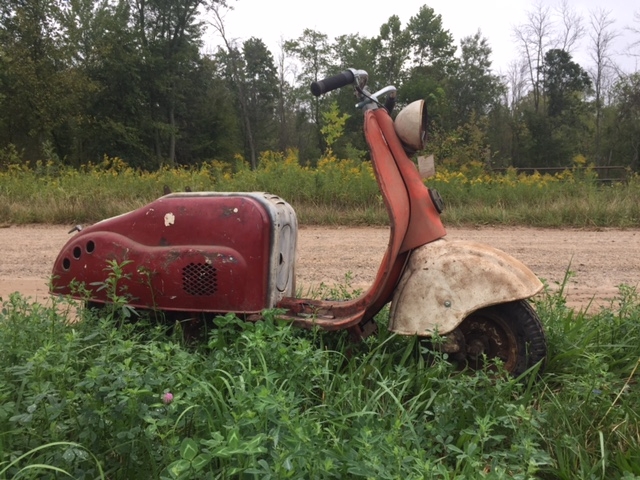
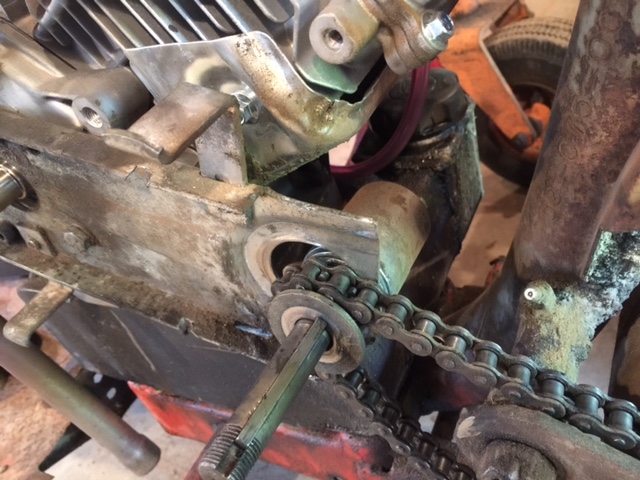
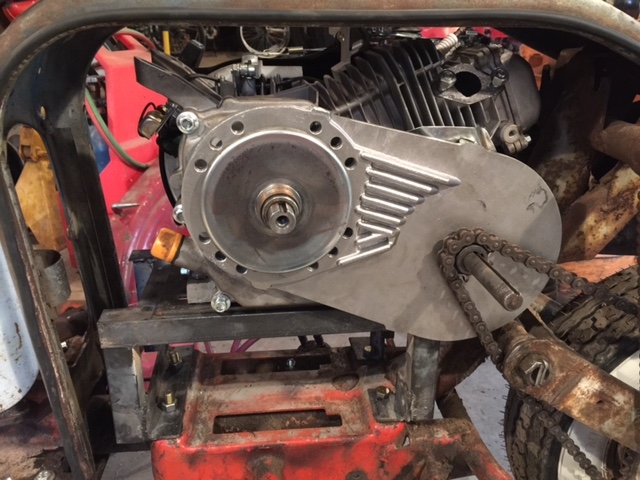
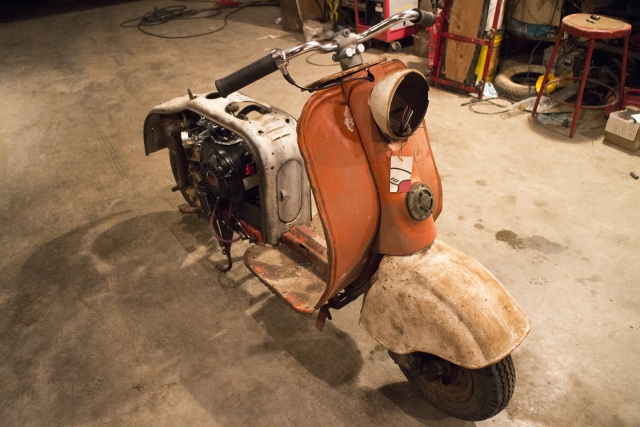
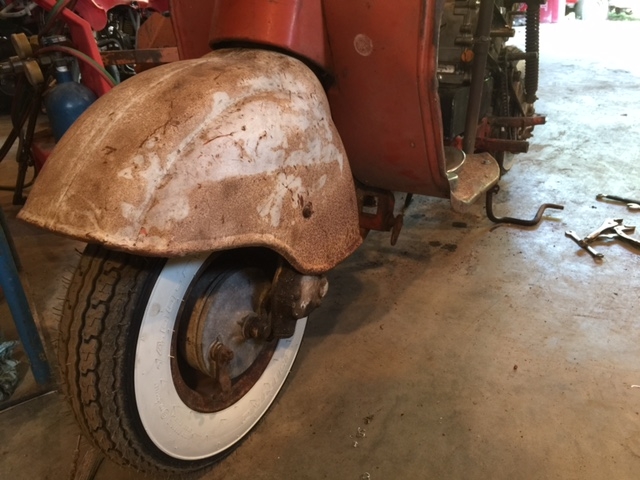
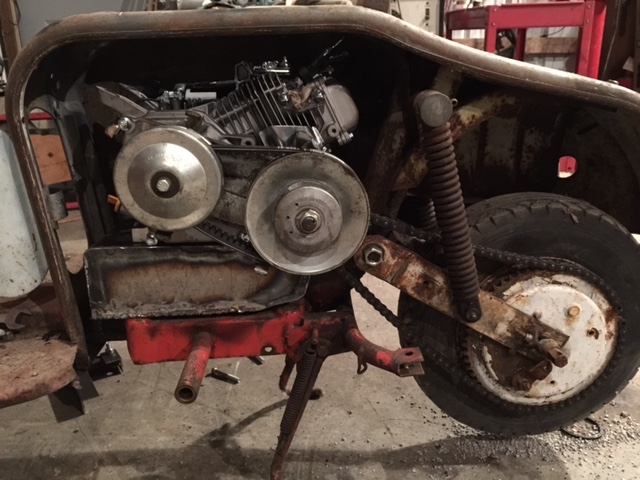
Found this guy on the local craigslist for not much. Its a 64′ Sears AllState/Vespa VBB, and is in very, very, very, poor shape. It must have been setting outside for the last 30 or more years as its got some issues. Motor wiggles, but is locked up and full of sand from sitting in the dirt. Back tire was rotted off the rim so I picked up this amazing teal wheel with a IRC tractor grip tire on it like the ones that came on z50’s. So far I’m thinking the Pigeons are built like tanks compared to these guys, I never realized that they had a monocoupe/unibody frame. I don’t care much for two strokes but have always wanted a Vespa to monkey with so it should be fun. Thinking of adding a tube frame under from the fork stem, down the tunnel, linking in the swingarm pivots, then running up to the seat and the rear shock mount. This way it can stay just as nasty rusty as it is and still be sturdy. It would be nice to ride it down the road without fear of hitting a bump and it folding up on you like a banana. Hopefully this summer there will be tinker time to work on it after the Pigeon is done.

03/21/16

Silver Pigeon Re-power: Breaking things on the C-75

This has been a long time coming, but last fall I finally got around to shoving a running motor into the guts of my old Mitsubishi C-75. Please note that this is the first part, in which everything breaks and I end up redoing and rebuilding much of what I had setup.

After trying for many years to source correct parts for the scooter I finally figured screw it, this things going to move under its own power and be reliable. I have one of the original running motors in my C-80 and was never too impressed with the thing. It moved that fat pile of Japanese steel down the road okay but if you hit a hill or a head wind you were rolling back down into the mid 20’s. After being ran down a few times by the neighborhood dogs while climbing a small hill pretty much clinched my sourness at the power train. Not to mention the coils on those things seem to fail all the time with the varnish that’s supposed to keep them from grounding internally giving out and allowing it to slowly internally arc its self into a pile of melted copper and goop. That is if the motor doesn’t back fire and damage the clutch/kickstarter/centrifugal clutch assembly. Seriously, whoever came up with that one needs a talking too.


Anyways moving on. First I needed a new motor for the pigeon that would fit, and like most projects I ran down to Harbor Freight and picked up a 6.5HP Predator/Honda GX200 clone for $99.00. These are great little motors and really can’t be beat for the price. Plus they have a huge after market for performance parts and goodies from the karting guys.

So first, where to put this thing, to get the motor installed I made a small mock up stand on where It would go. It had to be up in the air so that the PTO/output of the planned Comet Torq-a-verter would be about even with the swing arm pivot point.

no images were found

There was not a lot of room in the belly of the Pigeon which made trying to work out where everything would go kind of a  pain. The 6.5hp Predator was actually just right size wise. If you tried to stuff anything bigger in there your going to have some problems with width.

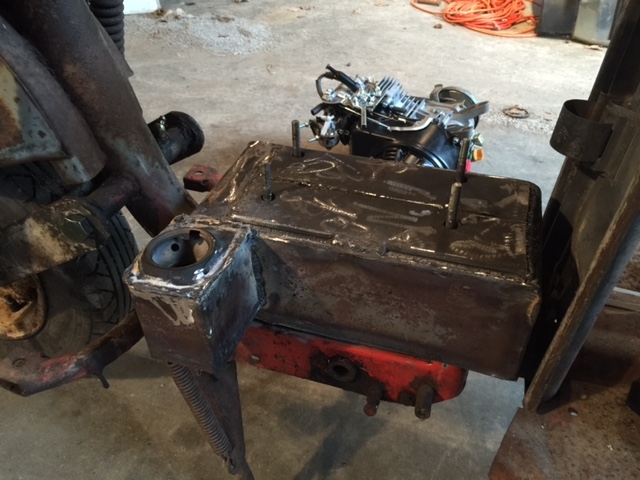
The gas tank was a bit of a problem since space was an issue. On the first build I ended up making this tank, which I was very proud of. If you are rebuilding your Pigeon, DONT BUILD A MOTOR MOUNT TANK. It worked great for a few short trips. But then, the steel starts to flex from the torque of the engine making cracks and you end up driving a dripping molatav cocktail. Its fun! Just don’t slow down until your near some water or dirt so you can put the fire trail your leaving out (chain’s make sparks btw). For a brief moment that day the C-75 was trying its hardest to imitate the Delorean from Back To the Future.

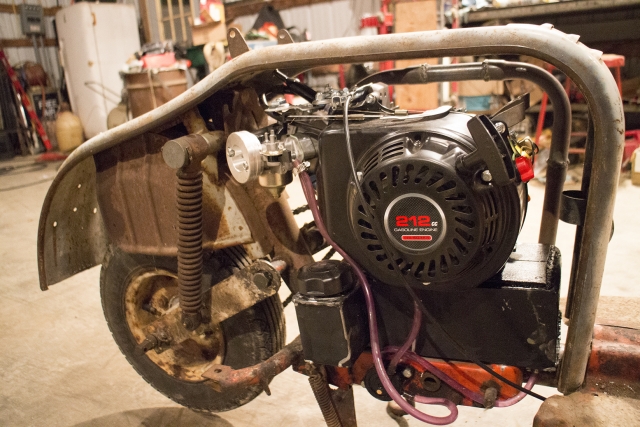
Just a simple Briggs and Straton fuel pump with a pulse jet intake manifold for vacuum runs the fuel up from the tank to the motor. I got the intake horn, pump, and intake manifold all from NR Racing. They have a lot of neat goodies for these little motors at reasonable prices.

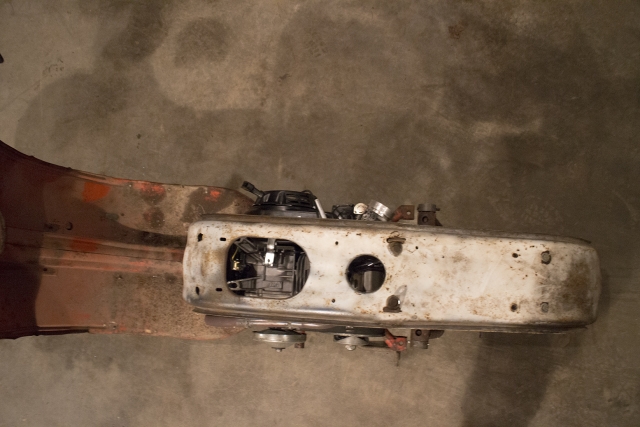
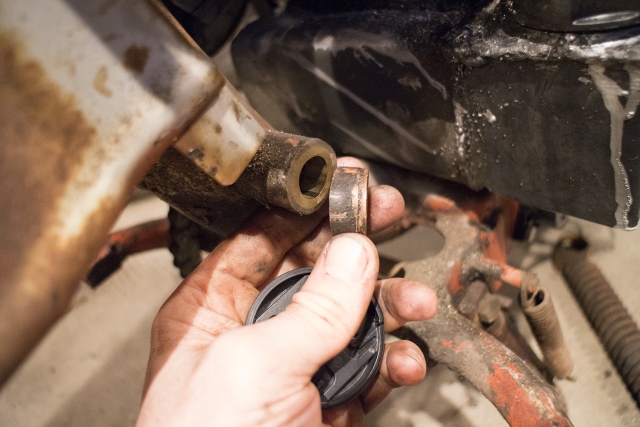
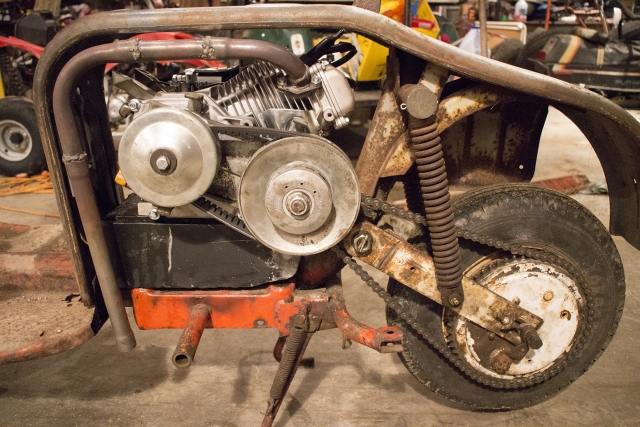
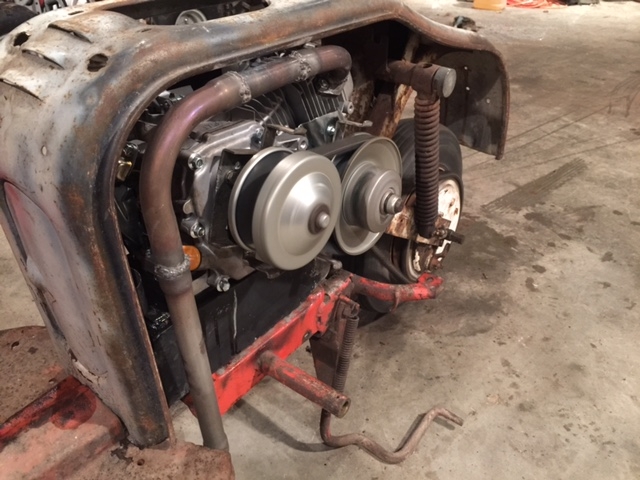
Motor on tank and a shot from above to show how much space is available on the sides of the bike. Pretty tight. Which leads to another problem with putting a 6.5HP clone and Comet clutch setup in a Pigeon, the swing arm/rear sprocket does not line up by about an inch. There is no room to move the motor to correct for this. So, I solved the issue by moving the swing arm to the side using a Sawzall to wack away an inch of swing arm bushing on the right side of the scooter, and spaced it with a bearing on the left side.

That bearing which you can see in under the chain acts also as a roller which is kind of handy and keeps it from eating the swing arm when it gets loose.

Fired up and running! Things are moving!

no images were found

I did re-gear the comet Torq-a-verter I had with a larger sprocket so the gearing would be a bit taller. Seemed to be about right as the scooter cruises around 35-40ish which is fast enough for dirt roads and 8″ tires.

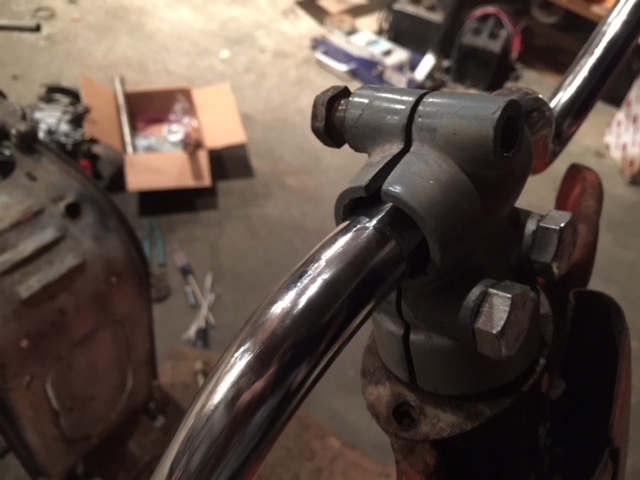
Now that the sheetmetal is fitted and the motor mounted its on to fix the goofy old dirt bike handle bars which look.. yeah. Not what a scoot needs that’s for sure. The C-75 ended up getting a set of Triumph T90-T100 bars from Low Brow Customs (a lot of stuff like the grips, cables, etc came from them and I can not recommend them enough). They seem to match the bend that the original Pigeon bars had. If you want some there are here: http://www.lowbrowcustoms.com/triumph-reproduction-handlebars-7-8-t90-t100.html

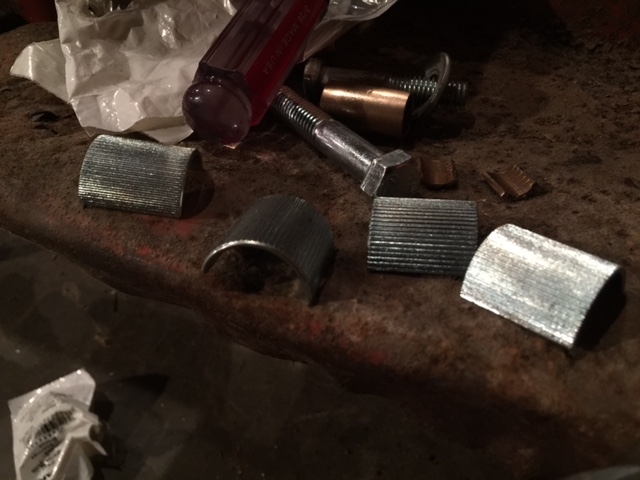
Some 7/8th bar to 1″ bar shims for the clamp. Work great, no slipping so far and pinches those bars down tight.

Almost like they belong there. So now to the first test ride. The pigeon managed to get me to the corner store and back two or three times with this setup until things went down hill. The Comet Torq-a-verter I had was an older unit with stamped steel backing (which is no longer made). And it died. Pretty hard. Made some sparks which then led to the above indecent with sparks and flaming awesomeness.

So after pushing the thing home I pulled the clutch to review the damage and the back bearing had pulled through the backing plate. My guess is on an earlier ride when the chain was thrown it locked up the sprocket hard after getting behind it and tweaked/tore the backing plate. Then over time it just ripped out. Surprisingly it was still kind of ride-able like this. Would not say it was happy to be ridden though.

So new backing plate! Comet now only sells these big old aluminum plates which solved all the flexy clutch issues and is working quite well so far. You can see the new motor mount in the above picture. I made a tank that slides into that gap so the motor was no longer mounted directly on the tank which solved many problems and actually ended up being bigger and holding half a gallon more than a normal tank.

On the next few rides I replaced the tank with a new one, mounted the motor on a stand so it would not hurt the tank, and bought some new tires since the back was starting to separate due to dry rot on a ride and was getting pretty dicey.

So this is the end of Part 1 of the C-75 adventure. I’ll get the new one up in the next month or so when things start to warm up a bit. Most of the bugs are worked out now and the Pigeon is quite happy to putter around the neighbor hood with its loud obnoxious straight pipe. For lighting I have a few Kohler parts setting on the bench at the ready, just need some time to install them. And once the lights are working I should be able to add an electric starter as well which will make things much nicer for just jumping on and scootin. As it is now having to pull a panel to pull start the motor is kind of clunky. Don’t be afraid to tear into any Pigeon projects you may have put on hold, these bikes were made to be ridden, even if that does mean cobbling them together like a 50’s cuban cab to keep them on the road.


08/26/15

Silver Pigeon Scooter update

I have two small updates on Silver Pigeon related news, which will only matter to the handful of us that actually own these scooters, and the smaller percentage of even that small amount that actually visits my goofy blog.

So Silverpigeon.org has been retired and I’ve rolled the site into this place to keep everything in one spot. You can now find all the old Mitsubishi Silver Pigeon stuff at http://silverpigeon.somethingthatdoesntsuck.com/. There are links at the top of this page and side as well.


I’ve also started working on my old C-75 Pigeon since I got sick of seeing it parked in the back of the barn as a pile of sheet metal. Since its motor did not like to run, but begrudgingly would, and its cvt clutch was MIA and the remainder butchered, I had some time ago decided to replace it all with something more reliable. This ended up getting over involved and complicated, and then stalled out when progress forward needed my buddy to machine a bunch of custom parts.

So its pushing forward now but I’m doing things much differently. Things are going to be simpler, with only a custom gas tank/engine mount getting in the way. The rest of the parts should be mostly off the shelf stuff in case anyone else out there would like to repower their scooter in a similar method.

So what its getting now is a Honda Gx200 clone motor with a Comet Torq-a-verter clutch setup. through the helpfulness of the custom gas tank/motor mount I welded up the motor should line its sprocket up with the rear. Its not perfect but given the space restraints it was the best I could manage. I have more parts on the way, so we will see how this works out. The electric start/charge system is going to be a pain in the rear. If you plan on going this route consider spending a bit more money and getting a motor with a starter or 7 amp charge coil on it already, or both if you can somehow spot that unicorn in the wild. More updates soon.


07/29/15

Metro Axles

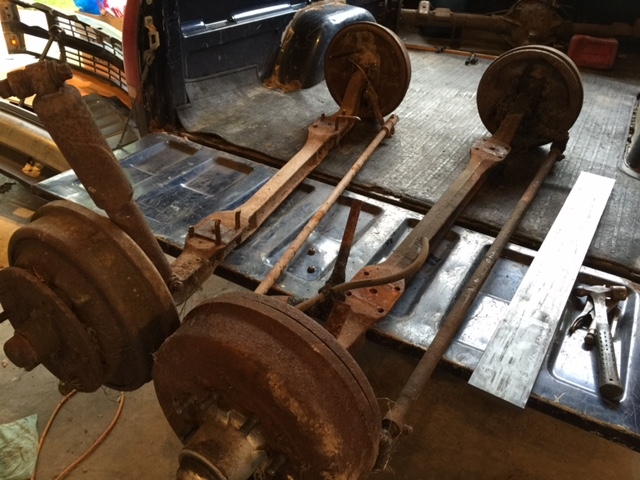
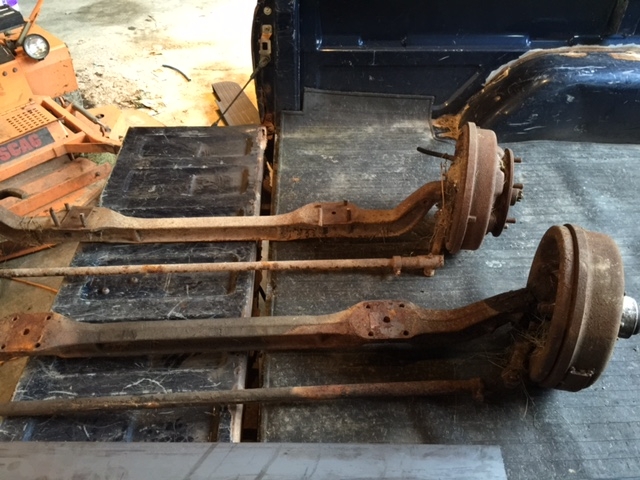
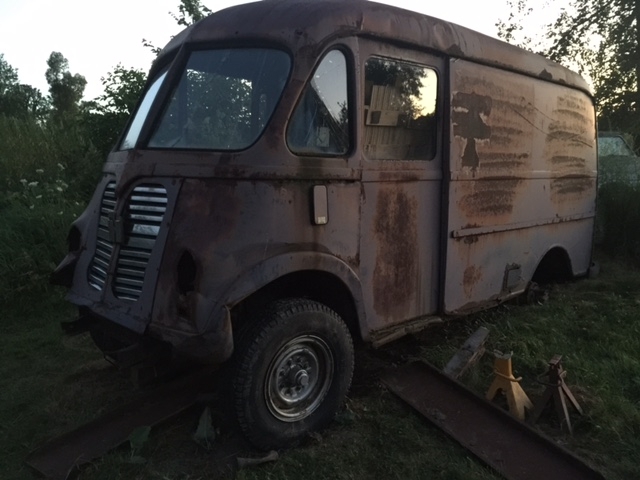
Spent the last couple years trying to find some replacement axles for one of my International Metros so that it could finally set up off the ground. Well, this summer I finally picked up a pair of front and back axles off a 72′ International 1210 pickup cause I thought and had read somewhere that they would be a direct bolt on. Well, when going to put the front on last week I found out that’s not the case.

The 1210’s axle has a 31 ‘1/2 center to center spring spacing, while the Metro had a 28″ spacing. The outside hub faces of the 1210’s axle will be about one inch wider on each side, Metro’s axle at drum face to face 64″ and the 1210’s at 66″.

So rather that try to hunt down another impossible to find truck I-beam I decided to just get some 1/2″ plate and make an ugly adapter of sorts.

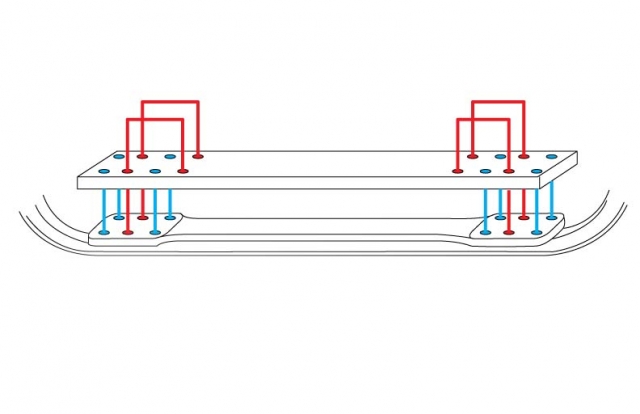
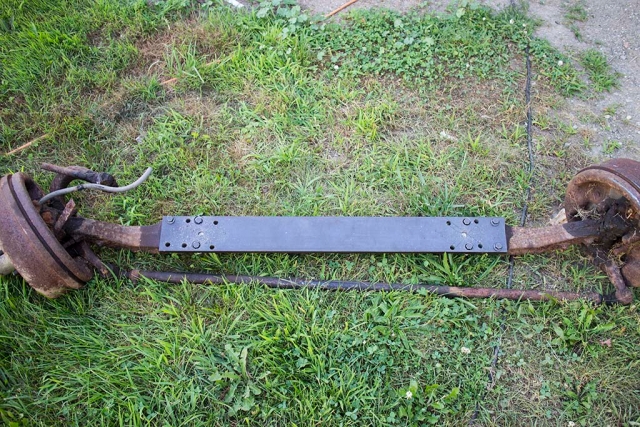
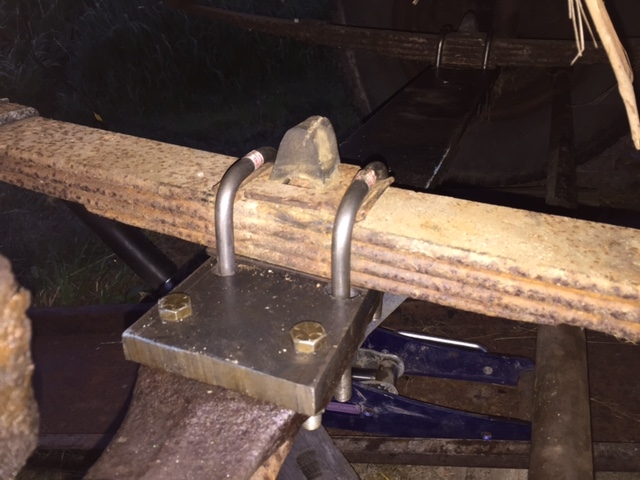
So this is the new 1210 axle, the plate bolts to it via the blue bolts and then the spring pads on the axle will be drilled so the narrower leaf spacing of the metro can allow the ubolts to go through the spring pad. Not pictured in the sketch are the centering pin holes, which are there on the actual adapter.

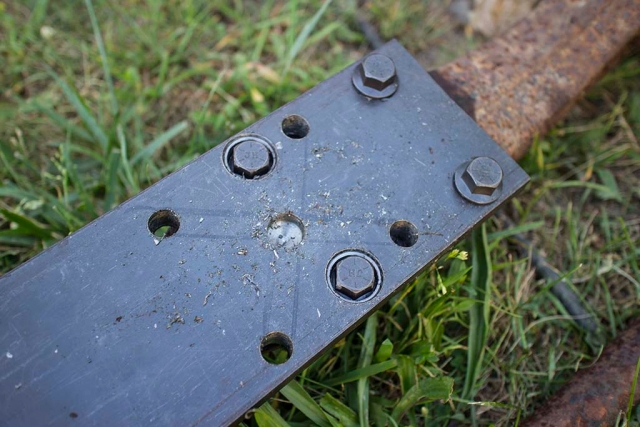
Can see here that I sunk the inside bolts down so that the top of their heads are flush with the top of the plate. The leafs of the Metro will just sit on top of them this way. Then just have to use the inner empty bolt holes for the new ubolts. I guess we will see how this actually works out. Should be alright I hope.

But going this route I’ll be able to use 8 bolt F-250 rims and tires, so no more split rims, and also the rear will get the old 1210’s Dana 60 which will allow it to actually cruise decently with traffic, maybe even keep up with things on the freeway.


Two out of four ain’t bad.